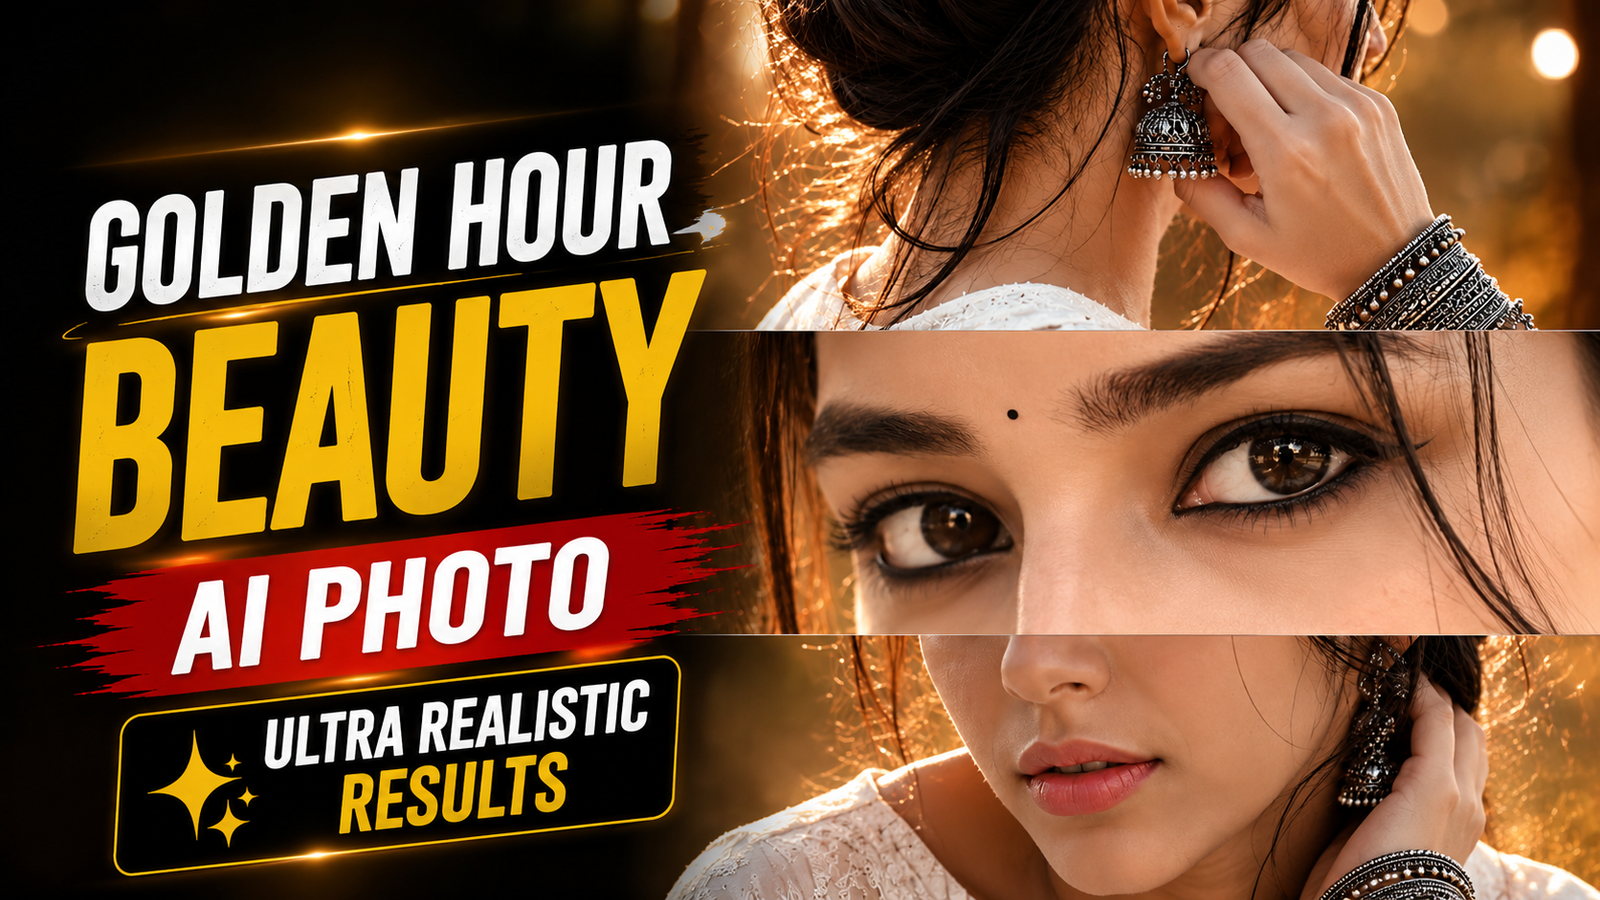
The Cinematic Eyes Focus AI photo editing prompt is the exact text you need to turn one ordinary selfie into a premium three-panel beauty collage — no photographer, no studio, and no editing skills required. Some portraits make you pause mid-scroll, and almost always it is the eyes doing the work. You do not need a fancy location, branded outfits, or heavy effects to get that reaction. A single sharp look, framed well, can carry an entire image on its own.
This is exactly why the Cinematic Eyes Focus AI photo editing prompt has been spreading so fast across Instagram, Pinterest, and Threads. Rather than packing everything into one wide shot, creators are stacking a few tight close-ups in a single frame — one for the jewelry, one locked on the eyes, and one soft portrait of the lower face. The end result reads less like a casual selfie and more like a beauty magazine cover.
The best part is that recreating it no longer demands hours in Photoshop. With ChatGPT, Google Gemini, and similar AI image tools, you can hand over one clear photo plus a well-written prompt and get that same editorial finish in a single try. Below you will find two complete versions of the Cinematic Eyes Focus AI photo editing prompt, ready to copy, plus step-by-step instructions for using it in both ChatGPT and Gemini. If you’ve tried other AI portrait prompts before, you’ll notice the Cinematic Eyes Focus AI photo editing prompt is far more specific about panel structure, which is exactly why it holds up so well across different reference photos.
In this guide
- Why cinematic eye portraits go viral
- What is the Cinematic Eyes Focus AI photo editing prompt?
- Where this style works best
- Tips before you generate
- Prompt 1: Cinematic Eyes Focus (standard)
- Prompt 2: Cinematic Eyes Focus (strict identity lock)
- How to use this prompt in ChatGPT
- How to use this prompt in Google Gemini
- Common mistakes to avoid
- Customizing the prompt for your own style
- Why the AI eye close-up portrait trend is everywhere right now
- Frequently asked questions
Why Cinematic Eye Portraits Go Viral
In any portrait, the eyes are the first thing a viewer locks onto. They show mood, confidence, and character far better than any background or color filter ever could. That is the reason photographers obsess over keeping the eyes pin-sharp and properly lit, and it’s exactly why the Cinematic Eyes Focus AI photo editing prompt leans so hard into that one detail instead of crowding the frame with effects.
Portrait photographers have long treated the eyes as the technical anchor of a shot — focus is traditionally locked on the nearest eye before anything else in the frame, because even a beautifully lit portrait falls flat if the eyes themselves are soft or lifeless. This prompt builds that same priority directly into the instructions you give the AI.
The collage layout also adds a quiet story. One panel celebrates the hair and earrings, the next zooms into the gaze, and the last rounds off the portrait. Stacked together, they feel deliberate, refined, and clearly composed rather than accidental.
What Is the Cinematic Eyes Focus AI Photo Editing Prompt?
In simple terms, it’s a block of descriptive text you paste into an AI image tool alongside your photo. The prompt tells the model exactly how to split the frame into panels, how each panel should be lit, what jewelry and wardrobe details to include, and what camera and lens characteristics to imitate. Because AI image generators respond almost entirely to the words you feed them, a vague request like “make this look editorial” will never produce the same result as a precise prompt that spells out panel structure, lighting, and facial detail.
That’s the whole purpose of this guide — to hand you a version of the Cinematic Eyes Focus AI photo editing prompt that has already been tested and refined, so you don’t have to guess at the wording yourself.
Where This Style Works Best
This format adapts to almost any platform you post on. Creators use it for Instagram feeds, profile pictures, Pinterest pins, fashion lookbooks, YouTube thumbnails, beauty pages, wedding teasers, and personal branding. Because the layout looks clean and high-end, it usually outperforms a plain single-frame portrait — which is exactly why the Cinematic Eyes Focus AI photo editing prompt keeps getting reused for cover art instead of a standard headshot.
Tips Before You Generate the Image
A strong prompt is only half the equation — your source photo does the rest. For the most lifelike output, keep these in mind:
- Start with a sharp, high-resolution photo, since the middle panel is an extreme macro shot of your eyes and needs real detail to work from.
- Make sure the eyes are open, visible, and lit naturally in your reference photo.
- Skip heavy beauty filters on the original — they flatten the texture the AI needs to rebuild realistic skin and eye detail.
- Use a prompt that spells out lighting, framing, and facial detail — not just a background swap.
- To protect your likeness, add strict face-preservation lines (see Prompt 2 below).
- Crop your reference photo to a clear head-and-shoulders shot before uploading, so the AI has the maximum amount of facial detail to reference.
These small adjustments tend to show up clearly in the final result.
Cinematic Eyes Focus AI Photo Editing Prompt (Copy & Paste)
Pair the prompt below with your uploaded photo to produce a premium cinematic portrait — expressive eyes, magazine-style framing, warm light, real skin texture, and DSLR-grade clarity. This is the base version of the Cinematic Eyes Focus AI photo editing prompt, and it works well when you mainly want the aesthetic rather than a strict identity match.
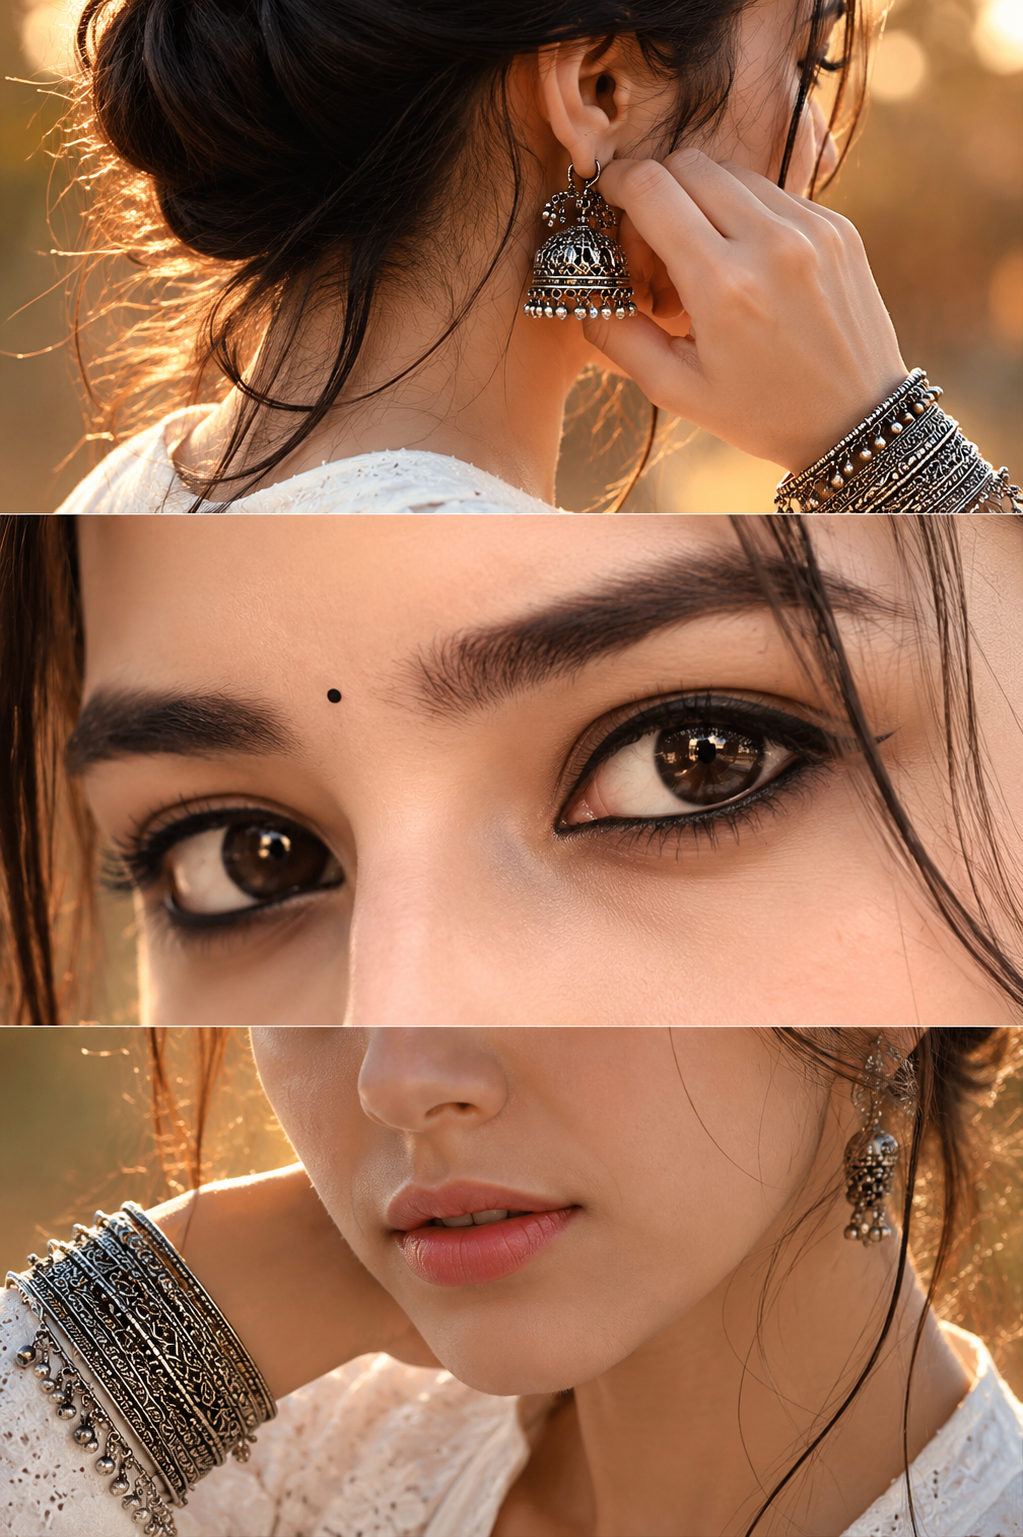
Use the uploaded reference image as the identity reference. Preserve the face, eye shape, skin tone, hairstyle, and facial features 100% exactly.

Create a premium vertical 3-panel collage.

Top panel: Close-up from behind/right side with the face mostly hidden (only a tiny cheek or jawline visible), focus on a large oxidized silver jhumka, hand gently touching the ear, stacked oxidized silver bangles, soft black kajal barely visible, loose hair strands, warm golden sunlight, creamy bokeh, shallow depth of field.
Notice how each panel gets its own mini brief instead of one long run-on description. Breaking the prompt into “top panel,” “middle panel,” and “bottom panel” sections is what keeps the AI from blending all three shots into one confused composition.
Cinematic Eyes Focus Prompt With Strict Identity Lock
Want tighter control over likeness? Use this longer version of the Cinematic Eyes Focus AI photo editing prompt. It adds explicit lines so the AI keeps your age, ethnicity, and bone structure untouched while still applying the full cinematic styling. This is the version most people should start with, since it keeps your actual features intact instead of letting the AI “beautify” your face into someone else.
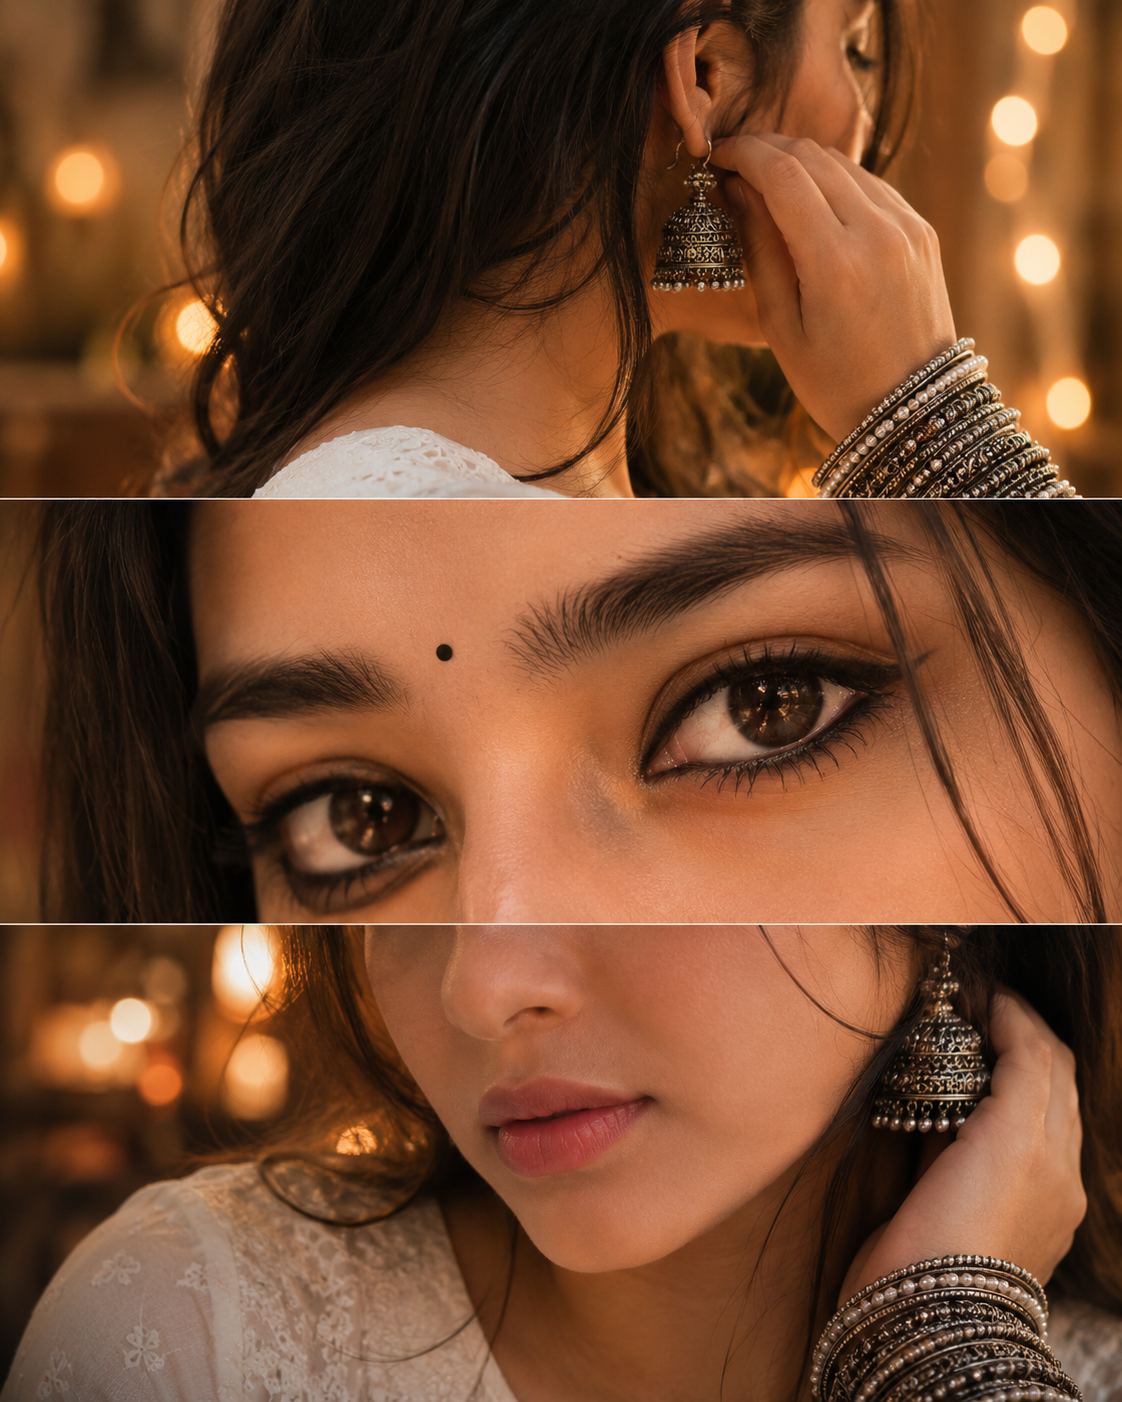
Use the uploaded reference image only as the identity reference. Preserve the person's face, eye shape, skin tone, hairstyle, facial proportions, lips, nose, eyebrows, and overall identity 100% exactly. Do not change the person's age, ethnicity, or facial structure.

Create an ultra-realistic premium vertical 3-panel collage (4:5 aspect ratio) with a warm cinematic luxury aesthetic and seamless panel transitions.

Top Panel
A close-up shot from the back-right side, where the face is almost completely hidden (only a tiny portion of the cheek or jawline may be visible).
The “Overall Style” block at the end acts as a final checklist for the AI — repeating the camera, lens, and lighting terms one more time after the panel-by-panel description helps keep all three panels visually consistent instead of looking like three unrelated photos stitched together.
How to Use the Cinematic Eyes Focus AI Photo Editing Prompt in ChatGPT
Getting this ChatGPT photo editing prompt to work well takes about a minute once you know the order of steps. Here’s the process:
- Open a new chat in ChatGPT and make sure you’re on a plan that supports image generation.
- Upload your reference photo first, before typing anything else, so the model has your face as context before it reads the styling instructions.
- Paste one of the two prompts above directly under the uploaded image.
- Send the message and wait for the render. If the panels feel unbalanced, reply with a short follow-up like “make each panel equal height and keep the middle eye panel sharper.”
- If the face drifts too far from your reference, resend Prompt 2, since it includes the strictest identity-lock language ChatGPT responds well to.
This ChatGPT photo editing prompt tends to perform best on the first try when your uploaded photo is well-lit and shows your whole face without sunglasses or heavy makeup already applied.
How to Use the Cinematic Eyes Focus AI Photo Editing Prompt in Google Gemini
Google Gemini handles this Google Gemini portrait prompt slightly differently, since it tends to weigh the text description a bit more heavily relative to the reference photo. Here’s how to set it up:
- Open Gemini and start a new conversation with image generation enabled.
- Attach your source photo, then immediately follow it with your chosen prompt from above — Gemini reads attachments and text as a single combined instruction.
- Generate the image, and review how closely the panel layout, jewelry detail, and eye focus match the prompt description.
- If Gemini merges the panels awkwardly, add a short reinforcing line such as “keep three distinct horizontal panels with clear separation and no blending between them.”
- For the identity-lock version (Prompt 2), keep the “do not change the person’s age, ethnicity, or facial structure” line intact — removing it is the most common reason Gemini outputs start to look like a different person.
Both ChatGPT and Gemini can produce nearly identical results from the same prompt text, but small differences in how each model interprets panel structure and lighting language mean it’s worth generating two or three variations before picking your favorite.
Common Mistakes to Avoid
Even with a strong prompt, a handful of habits can quietly ruin the final result:
- Uploading a blurry or low-resolution photo. The middle panel is an extreme macro shot of your eyes, so any softness in the original photo becomes very obvious.
- Skipping the identity-lock language. Without it, most models will subtly reshape your face toward a generic “AI-beautiful” default.
- Overloading the prompt with too many styling requests at once. Stick close to the tested wording above and adjust only one or two details per regeneration.
- Ignoring the panel structure. If you collapse the three panels into a single paragraph, some models will blur the distinction between them.
- Forgetting to specify the lens. Leaving out “Canon EOS R5, 85mm lens, f/1.8” often produces a flatter, more phone-camera-like result.
Avoiding these five mistakes is usually the difference between a Cinematic Eyes Focus AI photo editing prompt result that looks like a magazine still and one that looks like a rushed AI edit.
Customizing the Prompt for Your Own Style
Once you’ve generated a version of the Cinematic Eyes Focus AI photo editing prompt that you like, it’s easy to adjust individual details without rebuilding the whole prompt from scratch. A few reliable swaps:
| Want to change | Swap this phrase |
|---|---|
| Jewelry | Replace “oxidized silver jhumka” with gold hoops, pearl studs, or minimal studs |
| Eye makeup | Swap “bold black kajal, subtle winged eyeliner” for a bare, no-makeup look or a smoky eye |
| Lighting mood | Replace “warm golden sunlight” with “cool blue-hour light” or “soft studio softbox lighting” |
| Outfit | Swap “white embroidered cotton kurta” for a saree, blazer, or plain t-shirt |
| Background | Replace “creamy bokeh” with a plain studio backdrop or an outdoor garden blur |
Because the underlying three-panel structure of the Cinematic Eyes Focus AI photo editing prompt stays the same, you can mix and match these swaps freely while keeping the overall editorial, magazine-style feel intact.
Why the AI Eye Close-Up Portrait Trend Is Everywhere Right Now
The wider AI eye close-up portrait trend took off alongside the rise of accessible AI image editors that can realistically simulate macro detail instead of just applying a filter on top of a photo. Where older photo apps could only crop and sharpen an existing image, current-generation tools can actually reconstruct convincing eye texture, catchlights, and skin detail at extreme close range — which is why prompt wording about eye shape, lashes, and catchlights matters so much.
Beauty and fashion accounts picked up on this quickly, since a well-built AI collage can now stand in for an actual macro beauty shoot at a fraction of the cost. That’s also why prompts like this one keep circulating: once a specific combination of panel structure, lighting, and styling proves it consistently gets attention, creators reuse and adapt it rather than starting from a blank prompt every time. The Cinematic Eyes Focus AI photo editing prompt is a good example of exactly that pattern in action.
Frequently Asked Questions
- Can I use this Cinematic Eyes Focus AI photo editing prompt in ChatGPT?
- Yes. ChatGPT’s image generation lets you upload a reference photo and build cinematic portraits from a detailed text prompt like the ones above.
- Does Google Gemini support this prompt?
- Yes. Google Gemini can produce a similar collage style as long as you give it a clear reference photo and the full descriptive prompt.
- Will my face stay the same?
- If the prompt includes face-preservation lines, most current AI tools hold your real features steady and only restyle the lighting and composition. Prompt 2 adds the strictest lock.
- Is this prompt beginner-friendly?
- Completely. The Cinematic Eyes Focus AI photo editing prompt needs no editing experience — upload your photo, paste the prompt, and let the AI handle the rest.
- Why a 3-panel collage instead of one portrait?
- Splitting the shot into jewelry, eyes, and lower-face panels keeps every detail crisp at high resolution and gives the post a magazine feel that performs well on Instagram and Pinterest.
- Can I use this prompt without jewelry or ethnic wardrobe details?
- Yes. Simply remove or replace the jewelry and outfit lines in the prompt with plain wording like “no jewelry” or “casual t-shirt,” and the panel structure and lighting instructions will still work.
- How many times can I regenerate before the identity drifts too far?
- There’s no fixed limit, but if you notice the face changing after two or three regenerations, start a fresh chat and re-upload your original reference photo rather than continuing to edit the AI’s own output.
- Do I need a professional camera to get a good result?
- No. The prompt itself tells the AI to imitate a Canon EOS R5 with an 85mm lens, so a clear smartphone photo taken in good lighting is usually enough to get a convincing result.
Final Thoughts
Great photography is not about piling on effects — it is about lifting the details that already make a face worth looking at. The Cinematic Eyes Focus AI photo editing prompt proves that one honest glance, warm light, and smart framing can produce something that feels both artistic and timeless, whether you’re generating it in ChatGPT or Google Gemini.
If you want a portrait style that looks elegant, realistic, and built for social media, both prompts above are worth a test run today. For more ready-to-use prompts, browse the rest of our AI photo editing prompt collection, or check out our guide to the latest viral AI photo trends for more editorial formats worth trying this month.